Solution-wide project properties with Directory.Build.props

1. Problem

When you work with a solution which contains multiple projects, you usually have some kind of convention which is applied to all of the projects. For instance, in my case, I always make sure that Stylecop.Analyzers package is installed and properly configured in every project. In this particular case, this boils down to adding these lines into the csproj file

Unfortunately, you have to add these lines to every project in a solution in order to make the Stylecop.Analyzers work for given project. This might be fine if you create all of them up front, but in real life scenario sooner or later you will add a new project to the solution. In that case, you might forget about adding those magic lines, so you will end up with inconsistent coding style in your repository. An additional problem with this approach is a code duplication so in case you rename StyleCop.json file you will have to make sure you update it everywhere. A partial solution for that problem is a manual import of custom made .props file, however, this approach is not perfect as well. The import part is not automatic, that is why you still have to remember about adding import directive to all of your projects.

2. Solution

Fortunately starting form MSBuild 15 you can bypass the limitations mentioned above thanks to automatic imports of properties from Directory.Build.props file. All you have to do is to create a beforementioned file in the root folder of your solution and you are good to go. The properties defined in the Directory.Build.props file will be automatically propagated to all of the child projects. In my case, this file looks as follows

The sample application which leverages this feature can be found here

Solution-wide project properties with Directory.Build.props

RedisSessionStateProvider – unknown command ‘EVAL’

A couple of days ago I was trying to use Redis as session storage for one of my ASP .NET websites. Even though it seemed to be a rather straightforward task (Scott Hanselman wrote about that a while ago), I ended up with some weird exception while running the app: ERR unknown command ‘EVAL’
unknown command 'EVAL'
This wasn’t for sure a connectivity issue, as I was able to connect to Redis server from Redis Clientredis-cli. For me it looked like my server is not able to “understand” EVAL command. I started digging around and it turned out that this command has been introduced in version 2.6.0
I’ve connected to the server using redis-cli and checked the version with

command and basically that revealed the problem.
rediscli
As you can see I’ve accidentally installed version 2.4.6 (I have no idea how I ended up with so old version). After upgrading to the newest one, my problem was gone and I was able to successfully store session in Redis.
working

RedisSessionStateProvider – unknown command ‘EVAL’

Abusing collection initializers

Most of .NET developers are familiar with collection initializers syntax. Long story short, this language feature allows you to replace this ugly syntax

with much shorter and cleaner one

The more interesting thing is the fact that you can leverage this syntax not only for build-in collections but also for your custom classes. In order to do that your class must implement IEnumerable interface and expose public Add method. Let’s assume that we have some real case scenario and we have class which looks like that

This is a simple wrapper over the List. At this moment we can’t use collection initializer when constructing objects of this classs. However by adding method Add

we can create a new instance of that class just like we would do with List

What is more, it is possible to have multiple overloads of Add method in our class, so for instance if we add

we are able to use this syntax

In addition it is even possible to use a mix of Add overloads

Add method can also have multiple arguments

in that case we are able to use this syntax

The last thing I would like to point out is that Add function doesn’t have to be an instance method, we can easily implement it as an extension method and still leverage the collection initializer syntax.

Now with proper namespace import we can write this code

Source code for this post can be found here

Abusing collection initializers

Easy way to suppress code analysis warnings

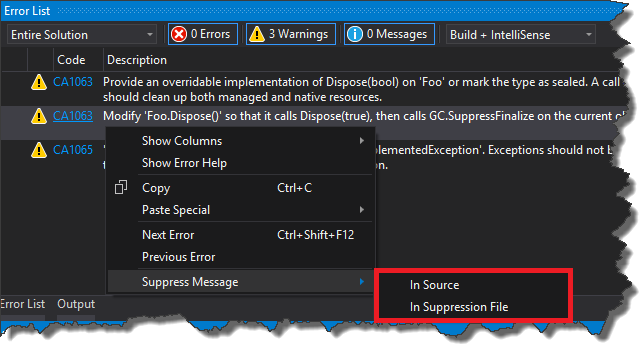
Everyone who has ever been using a code analysis knows that sometimes it is hard to follow the Microsoft coding guidelines and it is necessary to suppress some warnings. For me it always was a painful operation because I didn’t know any automated way of doing that. So basically I had to find the warning in the MSDN, copy category, code and other necessary stuff and then manually add appropriate attribute in code. Fortunately a friend of mine yesterday showed me a simple trick to generate this attribute with couple of mouse clicks. All you have to do is to right-click on warning message and choose Suppress Message context menu …
code analysis

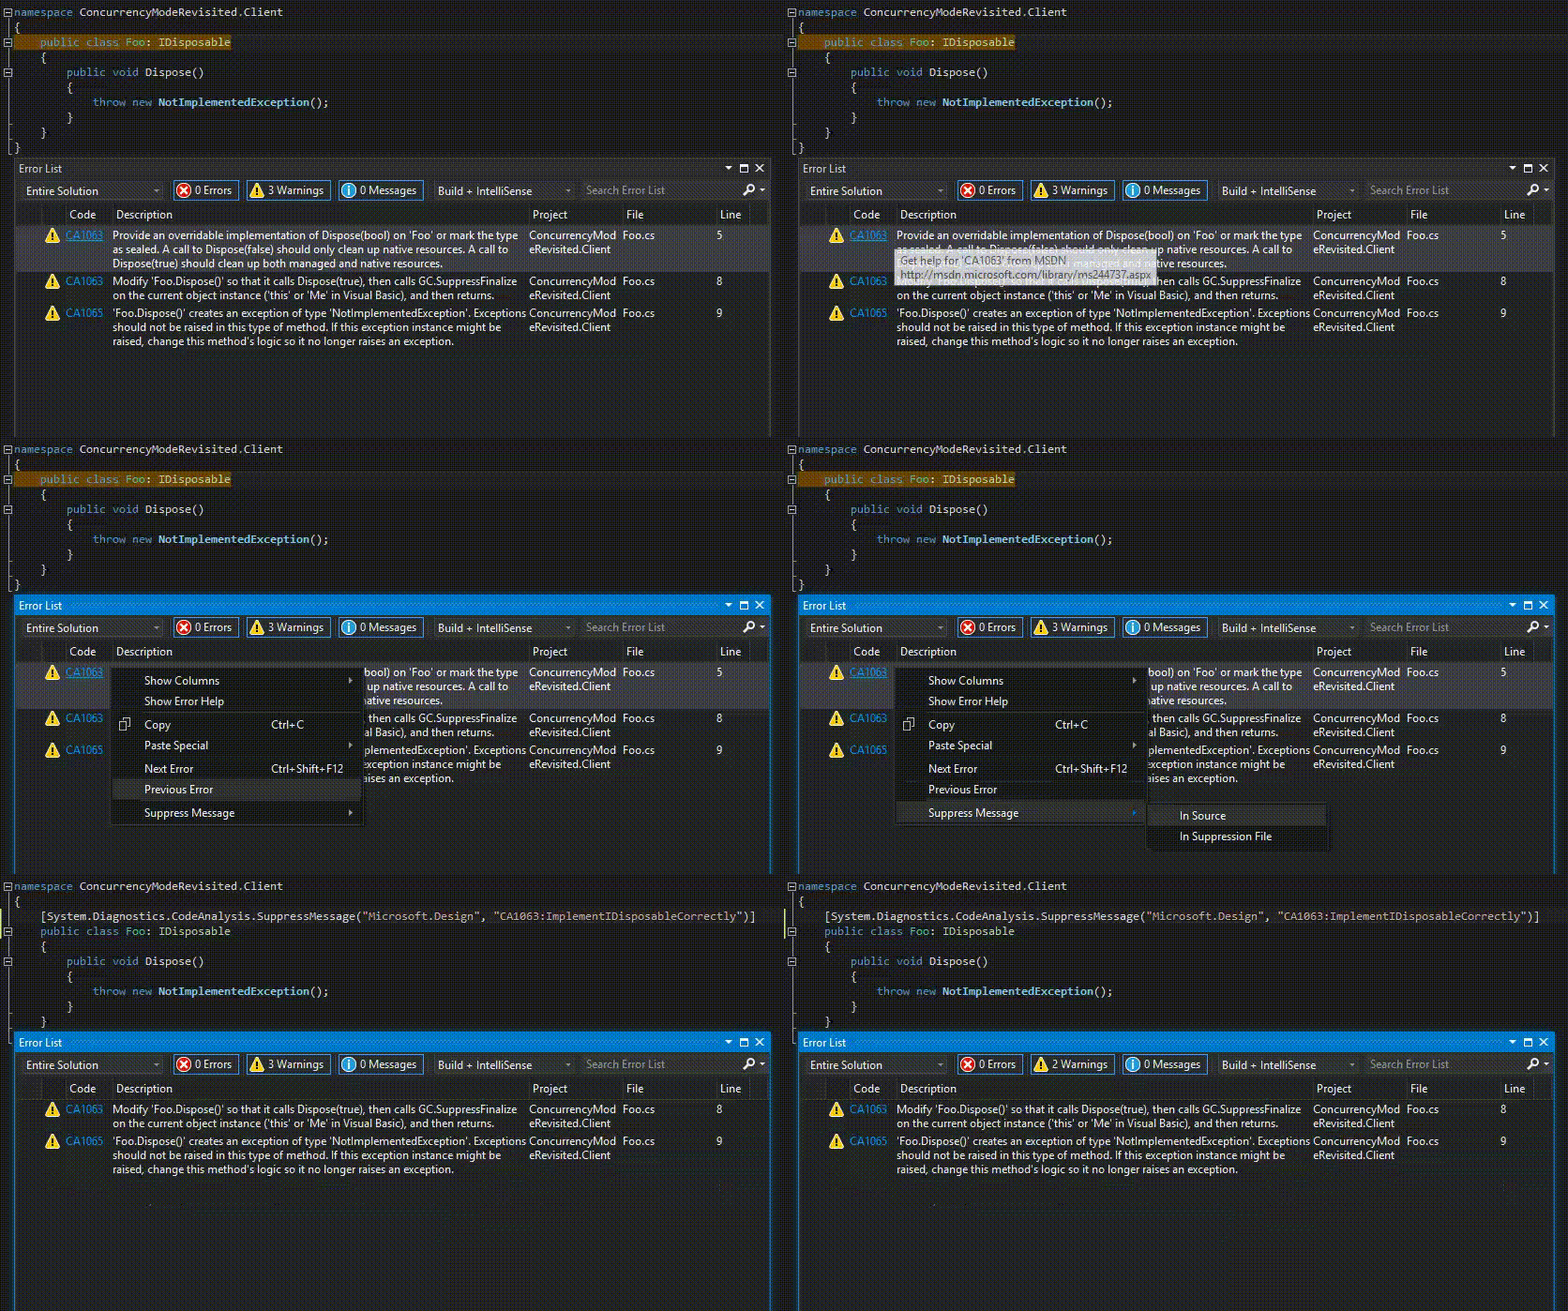
There are two options in there. The first option – In Source, will add attribute directly in the code

code analysis
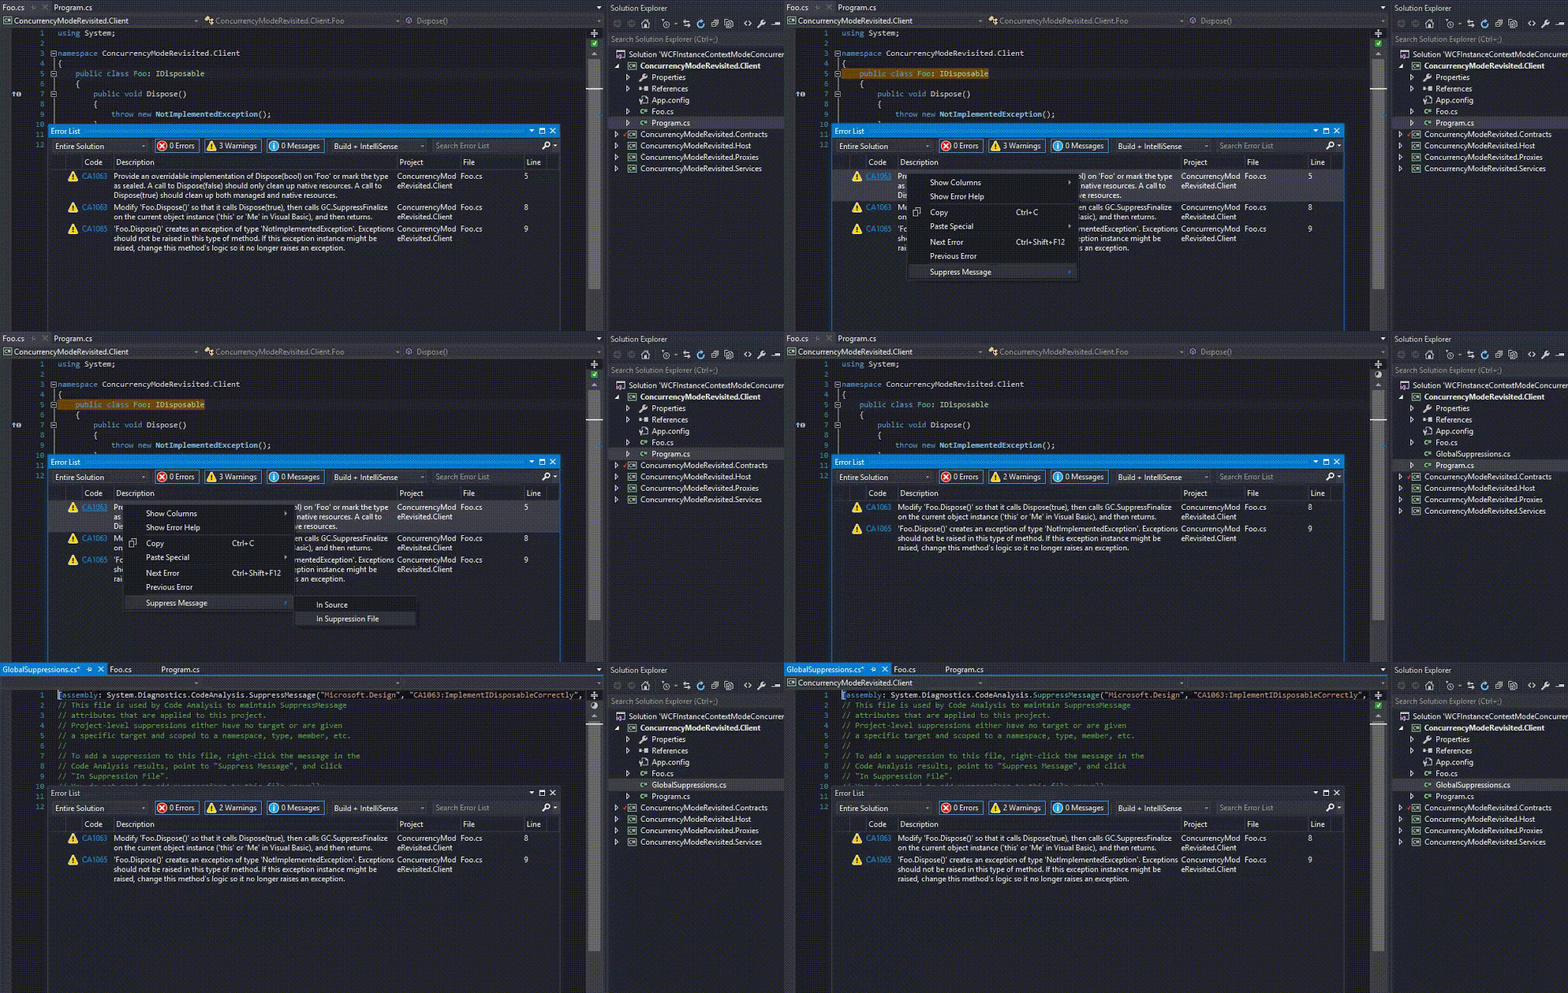
and the second one – In Suppression File, will create GlobalSuppressoins.cs file with assembly attribute which suppresses given warning in entire assembly

code analysis

Easy way to suppress code analysis warnings

C# – testing internal classes

I am currently involved in writing library which will be used by couple of external teams. In that library we have a quite a lot classes which are only used internally and won’t be a part of public API. The natural way of keeping that code inaccessible for other assemblies is to use internal access modifier. However this makes the code also inaccessible directly for testing. Of course you can still test your internal code through public API but usually this is inconvenient and forces you to write a lot of additional code in test. This is particularly painful for me, because our build process requires 100% test coverage. Fortunately there is an easy way to make internal classes visible for certain assemblies without making them public. All you have to do is to use InternalsVisibleToAttribute and specify assembly name which is allowed to use code with internal access modifier. This attribute is most commonly added to AssemblyInfo.cs file. For example, assuming that my library is in TestingInternalClasses.Lib assembly and my tests are in TestingInternalClasses.Tests I should add

to AssemblyInfo.cs located in TestingInternalClasses.Lib project. However you can also use this attribute in a class definition file – just like that

From now on I can easily test internal classes from TestingInternalClasses.Lib project in TestingInternalClasses.Tests. Source code for this post can be found here

C# – testing internal classes