Extjs 4.1.1 – validatable grid

In this post I will present a simple plugin to Ext.panel.Grid which displays validation errors on a grid. The validation mechanism is based on the model validation – useful feature of Extjs framework. Let’s start from creating a simple model:

As we can see, this model has a validation field where we can define a validation mechanism for every field in our model. In this example the lastname field is required, I use build in Extjs validator of the presence type. More build-in validation types might be found here. Of course, it is possible to define custom validation types, simple example can be found on StackoverflowHaving defined model validation, let’s create ValidatableGridplugin. The main function of ValidatableGrid plugin is function called validate which is attached to grid component. This function looks this way;

This function iterates through every model in grid’s store and runs validation method. As a result, we get a validationResult object which holds information about errors of model. This object has a function isValid which returns true if there is no errors or false otherwise. Having checked the model, we have to show errors on the grid. In order to do that, we have to find a cell, in which invalid field is displayed using getCellByPosition function. In the last step, we only have to modify CSS classes of cell. That is why, I added x-form-invalid-field class to show red line in cell and also data-errorqtip class to show validation error tooltip. The entire listing looks this way;

here is example of usage;

and the result
validatable grid
Source code for this post can be found here

Extjs 4.1.1 – validatable grid

Extjs 4.1.1 – multiselectable datepicker as plugin

A couple of weeks ago I wrote a post about creating a mutiselectable datepicker. The idea of creating this component was to use the object inheritance. Today, I would like to show how to create a multiselectable datepicker as a plugin to Ext.date.Picker. The code responsible for selecting dates is almost the same, the only thing which must be changed is the component initialization and access to the datepicker component. In order to make a plugin to any Ext.Component class, you must implement the init method which takes as argument a reference to the component – so let’s change the existing code to meet this requirement. We need to rename initComponent function to init. In addition to, we should delete the extend property from our code. After these changes the init function looks like this:

Please notice, that the init function takes as an argument the datepicker component – and from now on this is our only way to access this component. The rest of the code also requires some modifications – it’s necessary to change all references to the datepicker (from the variable me to me.datePicker). The entire code listing is presented below.

Here is example of usage;

and the result
multiselectable datepicker
Source code for this post can be found here

Extjs 4.1.1 – multiselectable datepicker as plugin

Windows Phone – skinnable application

1. Introduction

Today, I would like to present my concept of making skinnable application in Windows Phone 7.1. Making a skinnable application in Windows Phone might be a little bit tricky. Unfortunately, WP7 doesn’t support DynamicResource keyword which is a basic tool for making skins in WPF. In order to overcome this inconvenience I decided to write a SkinManager for WindowsPhone.

2. Base view

As I mentioned before, there is no support for using dynamic resources in WP7, therefore, in order to force a control to change style, we have to assign this style in code behind. It is rather obvious that in a single window/control there might be quite a lot of other controls whose style also should be changed. That is why, I decided to write controls iterator first.

In this iterator I used DFS algorithm for searching elements in a tree. Thanks to this piece of code I can take advantage of LINQ’s benefits. In the next step I created base classes for views.

3. SkinManager class

Having prepared basis for skinnable control, let me introduce a custom attribute called the SkinnablePartAttribute

This attribute should decorate custom controls which should have an ability to change theme/skin. As you can see, the SkinnablePartAttribute has a ThemePartName property which holds information about a name of ResourceDictionary where styles for the given control ought to be searched. Now, it is time to take a look at a SkinManager class. The SkinManager class has one public function – ApplySkin

This function iterates through all controls which implement a IViewBase interface – in other words, the function iterates through our custom controls. If a control is decorated with the SkinnablePartAttribue, a new Uri is created based on the information from the ThemePartName property and from the skinName parameter(I assumed that all dictionaries are located in the Themes directory). In the final step, private function also known as the AppySkin function is called. This function looks this way:

Here, all the magic begins. In the first step, current ResourceDictionary is transformed into the standard dictionary. The key of this dictionary is a value of style – a reference to the style object. In the next step, I created a new ResourceDictionary based on the Uri parameter passed to this function. In the last step, another loop over controls is performed. However, this time only controls with the assigned Style property are taken into consideration. Then, if the newStyleDictionary contains a key of given control style we are ready to swap styles.

Entire listing of SkinManager is presented below

4. Example of usage

In order to use the SkinManager it is essential to make some preparation. First of all, you have to create Themes directory in a project. In this directory there must be separate subdirectories for every skin you would like to use. What is more, in these subdirectories you should place all ResourceDictionaries specified in the SkinnablePartAttribute. A sample directory structure is shown in the picture below:
DirectoryStructure
The very last step is to make controls (which should be skinnable) inherit from ViewBase. Here is example of usage

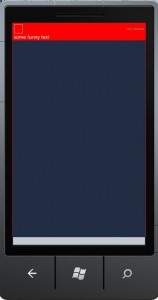
and screenshots of the same view with different skin

skinnable application

5. Controls with dynamically changing content

After some test, it turned out that the mechanism presented above has problems with controls which change their content dynamically. Let me clarify – styling grids, list boxes etc. work fine, however changing row styles and listboxitem styles are not working properly. In order to overcome this problem you must define a style for a specific target type. Here is an example of usage with the listbox:

Windows Phone – skinnable application

Extjs 4.1.1 – multiselectable datepicker

Recently, I have been given a task to make extjs datepicker allowing for selection of multiple dates. Unfortunately afters hours of searching for some build-in function, it turned out that this kind of functionality is not supported by default. Finaly, I decided to extend datepicker by creating component called highlightableDatePicker. I started from creating a class which inhierits from Ext.picker.Date. First draft of class looked this way

In this class I created additional function highlightDates which is responsible for highlighting dates. Moreover, I added some additional config elements:

  • selectedDates – object keeping track of dates which should be selected
  • clsHighlightClass – css class defining selected cell style

The most important part of HighlightableDatepicker class is function highlightDates which is responsible for highlighting dates. The body of this method looks like this

As You can see, this function simply compares date in cell with dates stored in selectedDates. If there is a match, cell style is modified by adding extra CSS class into class attribute of cell (see addCls function of Extjs), otherwise CSS class responsible for highlighting is removed. Having defind highlightDates function,I also had to attach an event handler to select event, in order to modify collection of selected dates. This handler looks this way

The final step to make this control work is to attach event handlers and call highlightDates function during initialization of component.

Please, notice that highlightDates is called after component is rendered, because there is no rendered cells before that moment. Entire code listing is presented below

and the result
multiselectable datepicker
Source code for this post can be found here

Extjs 4.1.1 – multiselectable datepicker

Extjs 4.1 – zmiana stylu konkretnej komórki w gridzie

Witam Dzisiejszy post nie będzie związany z platformą .NET, lecz z javascriptowym frameworkiem Extjs w wersji 4.1. Jako, że ostatnio w pracy poświęcam dużo czasu na pisanie w wyżej wymienionej technologii postanowiłem zaprezentować, w jaki sposób zmienić styl konkretnej komórki w gridzie. Zacznijmy od przygotowania danych do wyświetlenia – zdefiniujmy zatem stora, który będzie przechowywał informacje mające zostać zaprezentowane na gridzie.

Następnie podepnijmy stora pod grida w wersji podstawowej – bez zmiany stylu konkretnych komórek.

W celu zmiany parametrów poszczególnych komórek grida posłużymy się tzw. rendererem. Renderer jest to funkcja, której zadaniem jest modyfikacją komórek w danej kolumnie grida. Dzięki rendererowi możemy nie tyko zmienić zawartość komórki, ale również przypisać jej osobny styl lub klasę CSS. Myślę, że renderer można porównać do conwertera znanego z technologii WPF. Funkcję renderera podłączymy pod ostatnią kolumnę. Kod po modyfikacjach będzie wyglądał w następujący sposób:

Zauważmy, że funkcja renderer przyjmuje kilka parametrów. Najważniejsze z nich to

  • value – wartość wyświetlona w komórce grida
  • metaData- obiekt dający nam dostęp do parametrów komórki (np. tdCls)
  • record – record grida

W moim przypadku na podstawie wartości wyświetlanej w komórkach kolumny “Change”,określam czy dana komórka powinna być czerwona czy zielona. Wygląd grida przed oraz po zastosowaniu renderera przedstawiają poniższe screeny
Before
zmiana stylu

Extjs 4.1 – zmiana stylu konkretnej komórki w gridzie